Wednesday, September 26, 2012

Nail Polish - 4 Things I learned yesterday

1. Revlon makes GREAT nail polish.
2. Leopard nails are really hard to do on yourself.
3. I am not ambidextrous with doing my own nails artistically like I am with makeup
4. I could never be a hand model, I have little kid hands.

Ok, to elaborate on that all...

I've been on the hunt for a while for awesome drug store polish that comes in colors that I can do a good leopard print nail. I finally found them!! The other day I tried Revlon Colorstay Polish, and did an awesome teal and black french tip that stayed beautifully, and this time, I found great colors with Revlon's Top Speed nail polish. Golden took 2 coats for good opacity, and it a gorgeous rich metallic gold.  Espresso is a deep warm satin brown.


Clear base coat, then 2
coats of Golden
Dots of Espresso after
Golden had dried.

After the little brown dots, I used a decorating polish (not sure what kind, I stole it from my kid!!) in black to do the outlines. Any drug store has them though in the nail section. Easy to find and since it's just lines, I imagine any of them would work.

And the end result...

Leopard nails attempt 1!

That's my right hand, the 'better' hand. A coat of clear polish is on top, and that definitely helped the end result. This hand looks better than the other hand, but I've concluded they are still acceptable enough to wear though and I am! For attempt number 1, I'll call this pretty good. And now I have the polish to keep trying and getting better. I am pretty sure I took about 15 pictures of my hand to get this one. They won't be hiring me anytime soon to be a hand model!!

Tuesday, September 25, 2012

Behind the Scenes

I recently has the pleasure of doing an alt fashion photoshoot for local latex clothing designer Penny, owner of Lust Designs. She has a gorgeous ready-wear line of latex clothing and also does fantastic custom work. No sneakpeeks of the actual shoot, for that, you will have to wait for the next issue of Von Gutenberg Magazine, an alt fashion magazine. This shoot was a TON of fun! How often do you get to shoot awesome fashion in the stunning trees of Mt Tam and kill your model? Thats right! I got to play with FX for this themed photoshoot. I created a custom chest wound. Something her 'heart' could be pulled out of. Heres some behind the scenes shots of the fun!

First I needed a heart. I called a few butchers to see if any had an intact, whole cow heart I could purchase. Despite the fact that SEVERAL said yes, I showed up to each of them only to find them sliced, cubed, out of stock, or disappointing in one way or another. Finally, I found one that was just flayed open. One single cut. I gave in and bought that one and spent the night before the shoot sewing it back together. (See, I'm so good I can mend a broken heart!)  Those things are big!! That's a standard dinner plate.  It was awesome being able to do FX on something that would be published. I'd played around with it before, and done bruises and tattoos and things like THAT on shoots, but this was my first published prosthetic appliance. So stoked!

On to the shoot!

Here's a few shots of me getting everyone ready! I can't wait to share when the actual spread comes out.
Fixing the hair around a very cool custom crown made for the shoot


Looks so surgical! Covering the clothing so
I can apply the prosthetic.

Done attaching, now on to blending and the blood!


Tuesday, September 18, 2012

Keeping brushes clean


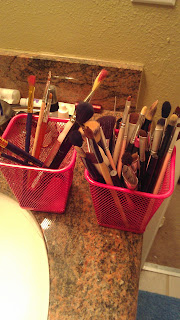
As a makeup artist, I clean my brushes after every use in order to not transfer any germs between clients, but the brushes I use on my OWN face need washing too on a regular basis to keep them nice, and to keep my skin healthy. Any mild shampoo can be used to wash your brushes. A lot of people use baby shampoo, I personally use Suave shampoo. its cheap, works well, and smell great. I've been asked what the proper way is to wash your brushes, so I put together this post.

I'm out of Suave, but was given a bottle of Trader Joes shampoo, so I tried that out this time. I LOVED it. It cleaned really well and had a nice mild smell that didn't stick to the brushes.


The Shampoo
My dirty brushes

When washing your brushes, keep them angled down. This keeps water from dripping up into the ferule (part that holds your bristles together on the handle) and can loosen the glue and eventually make it fall off.

Wet your bristles and gently swirl your brush in a bit of shampoo in the palm of your hand. Be careful to not smash the brush, just lightly swirl, rinse well. Cream products, gel liners, and black products can sometimes need a second washing. Rinse well. Roll up a hand towel halfway and rest your brush with the handle on the roll to dry (so that the handle is higher than the brush head).

Rolled hand towel.
Lay flat to dry.
Gently swirl in palm.

For large brushes like powder or blush brushes, after rinsing, gently squeeze to remove excess water, the twirl the brush (head down) quickly between your palms. Excess water will spray out and refluff your brush so that it dries in the proper shape, then lay on towel to dry.


I had to get a second towel, I ran
out of space! Here they are, all
laid out to dry.

Dry, packed up, and ready to shoot!


I recommend washing your brushes at least twice a month. I try to do my personal brushes once a week as I use a lot of gel and cream products.

Tuesday, September 4, 2012

I'm getting married!!

He proposed, I said yes, we've set the date!! I'm so excited and have a million ideas! So many conflicting thoughts as far as what we want for a wedding. Part of me wants this big huge extravagant formal affair (and someone else to foot the bill) and another part of me just wants to run off to Vegas with some close friends and family and save the money for the good stuff... like a house, honeymoon, and sailboat.

My ring!! It's perfect and even more stunning in person. :D


Right now, our plans are falling somewhere in the middle. We've picked an awesome venue and have a ceremony planned in the sand on the beach. His 'best man' is a designer/seamstress and will be making my dress for me. I feel so special! We've tried to get started a few times, but the only conclusions I've come to on my dress are that I have NO idea what I actually want it to look like.

I want to share this planning adventure with you all and will do my best to keep it also beauty related. I'm joining the ranks of my bride-to-be clients and am THRILLED about it!

We're not a terribly traditional couple, and out wedding day looks definitely won't be too traditional. I've got a dreadlocked mohawk with (when I find the time to keep it properly dyed) leopard print sides. I'm definitely  keeping the hair. I'm thinking about adding some pearls to the strands to fancy it up. My makeup I'm (surprisingly) struggling with. I'm flip-flopping between hiring a friend, and doing it myself. I'll let you know what I decide, and for now, I'm starting a new skin care regimen. I don't want eye wrinkles or pimples in my wedding photos, and NOW is definitely the time to start something new. This way, my skin will have time to adjust, and I can play around with different products until I find something I really like.

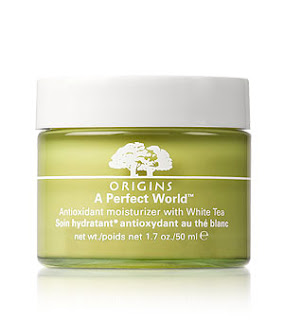
Skincare for me is a tricky one. I have the most sensitive skin I have ever come across. Most things burn, or break me out so I've always just used a castile cleanser and coconut oil to add moisture. Now that I've hit 31 though, something to prevent wrinkles is enticing! I've started my new skincare routine with Origins: A Perfect World moisturizer. So far, its FANTASTIC! No burning, no irritation, and my skin actually feel more moisturized than it was with the coconut oil. I went with this line first because its very natural and uses great ingredients. This specifically is intended to be anti-aging which is what I wanted for most of my face.

I purchased mine at Sephora: http://www.sephora.com/a-perfect-world-antioxidant-moisturizer-with-white-tea-P297512 
I'm going to give it another week or two and then add an eye serum (I have little wrinkles at the end of the day that need to go!) and then a new face wash after that. I'll keep you posted on what I use for both, and hopefully will have stunningly bright, clear skin for my wedding day.